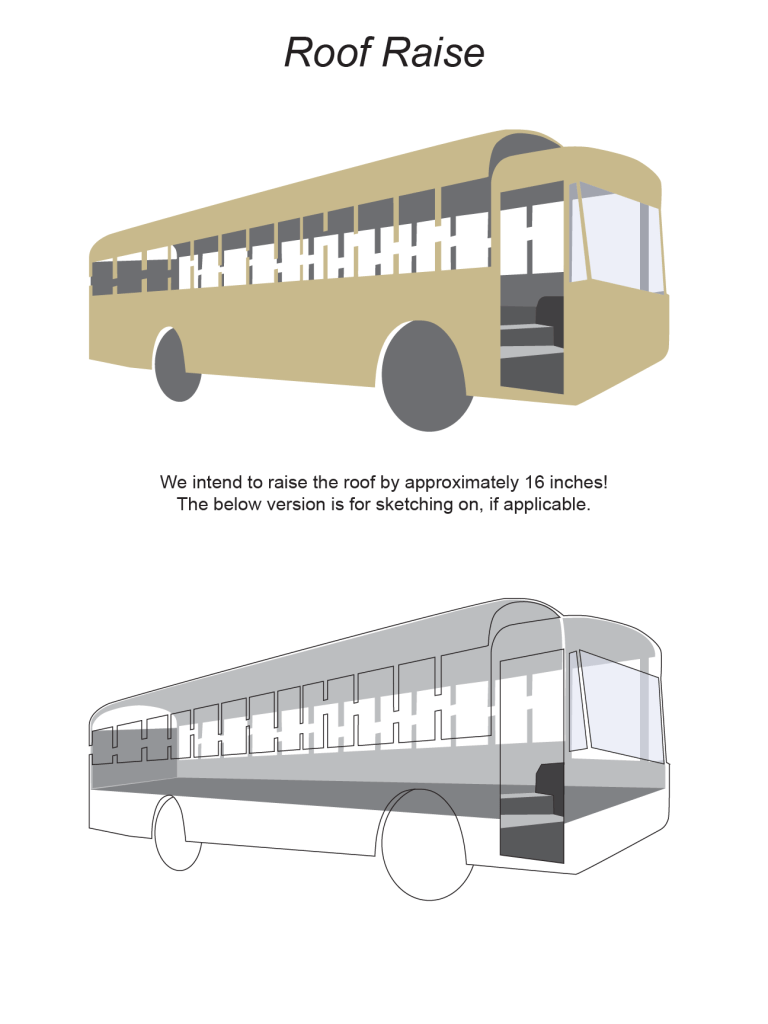
What’s more nerve wracking than raising the roof of a school bus? Leaving it raised until all the new supports are welded on!
Read more: How we Roof-Raised Bailey the BusInstructions to the Crew
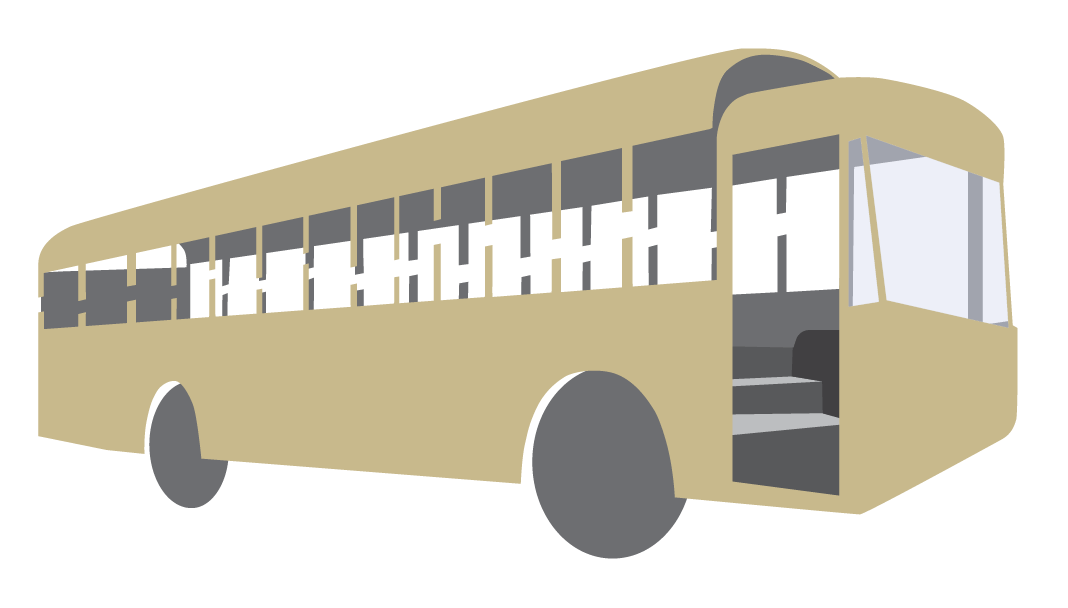
As shown in my Illustration and Design Portfolio, these graphics were made with the specific intent of instructing my coworkers and friends at Gallucci Studios, LLC on how exactly we were going to raise the roof of my 40-foot school bus.
These are the steps we took:
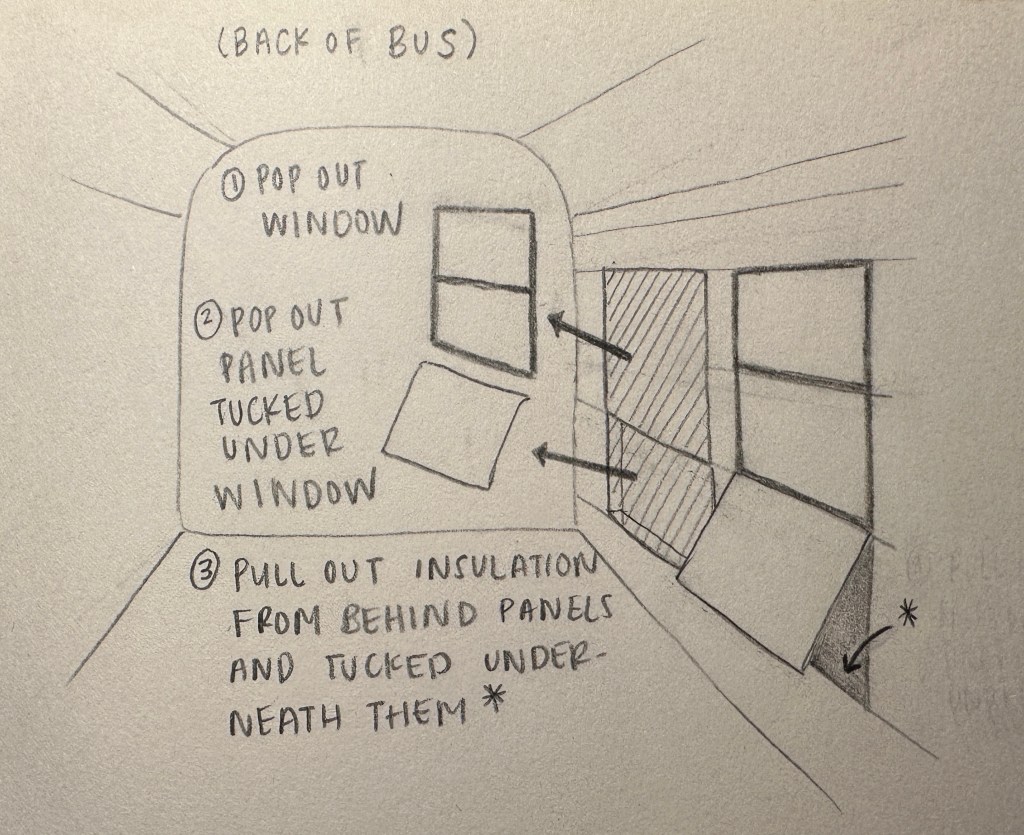
- Windows Removal
Before cutting anything, the bus needed to be brought down to its “shell” by removing all insulation and interior layers of sheet metal. Imagine a sandwich consisting of bun-onion-bun. The buns are the sheets on either side, the onion is the bus’s frame or skeleton.
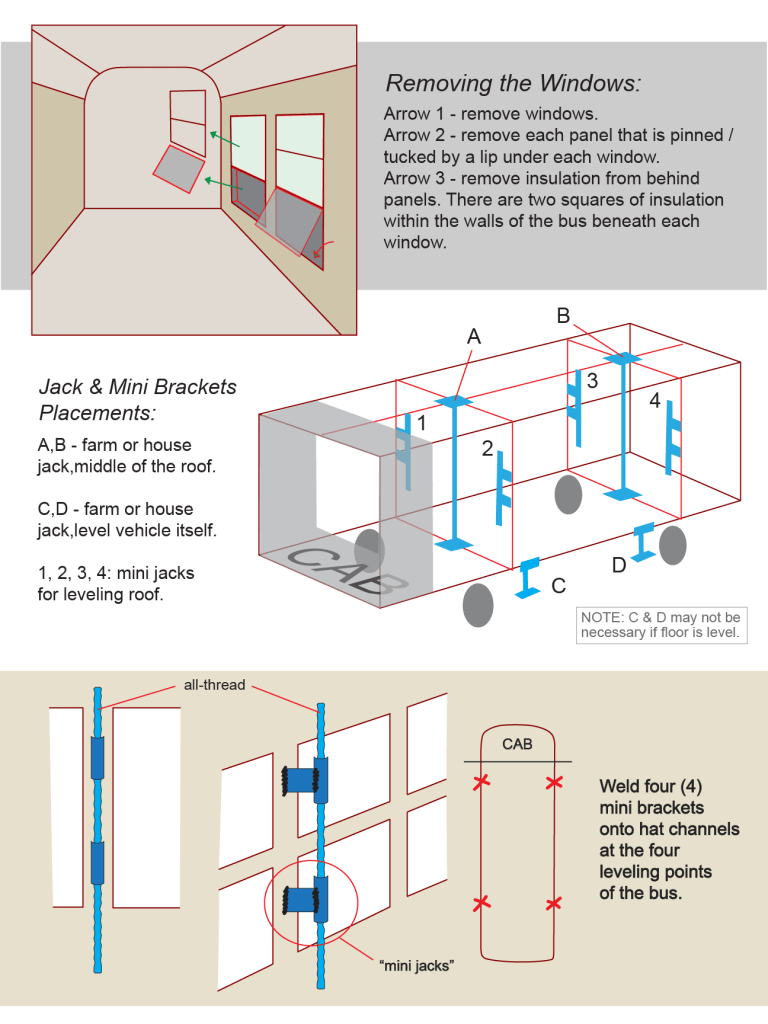
After removing most of the inner “buns,” the metal sheets, the final remaining interior sheets were lap-jointed panels, each of which with a “lip” (a folded edge) that tucked under the windows. This means that to remove one required removing the one layered previously, on top of the next. However, we wanted to remove the windows at the last moment – to reduce how long the interior be exposed to moisture and evade rust build-up on the floor. - Jacks & Mini Brackets
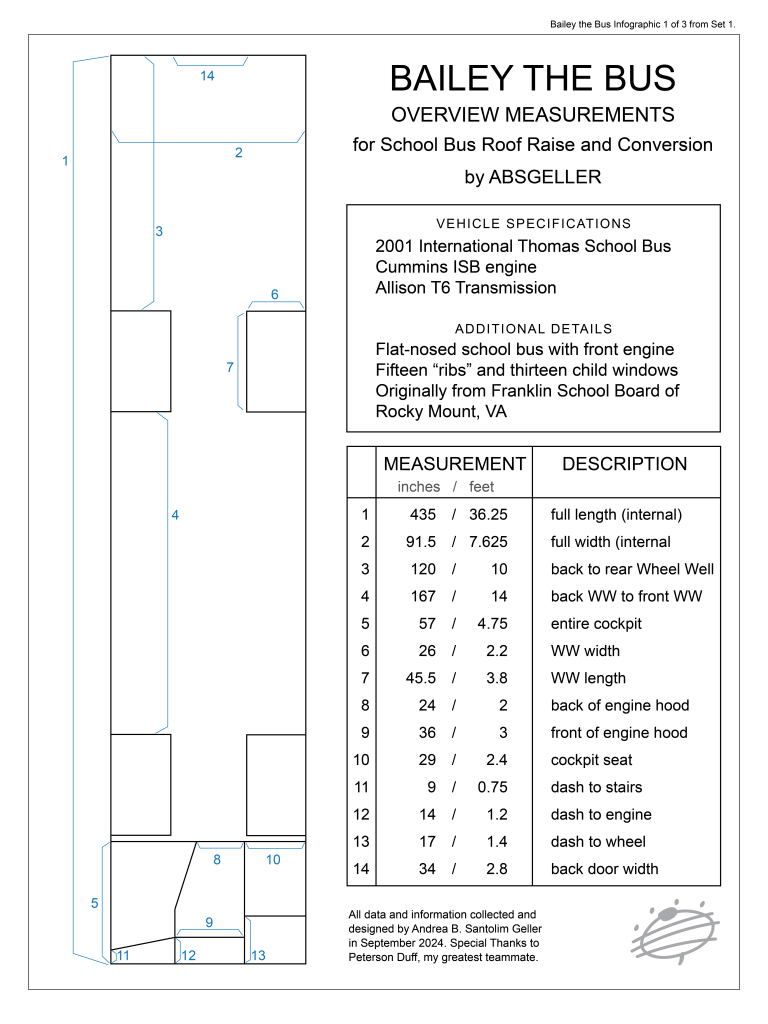
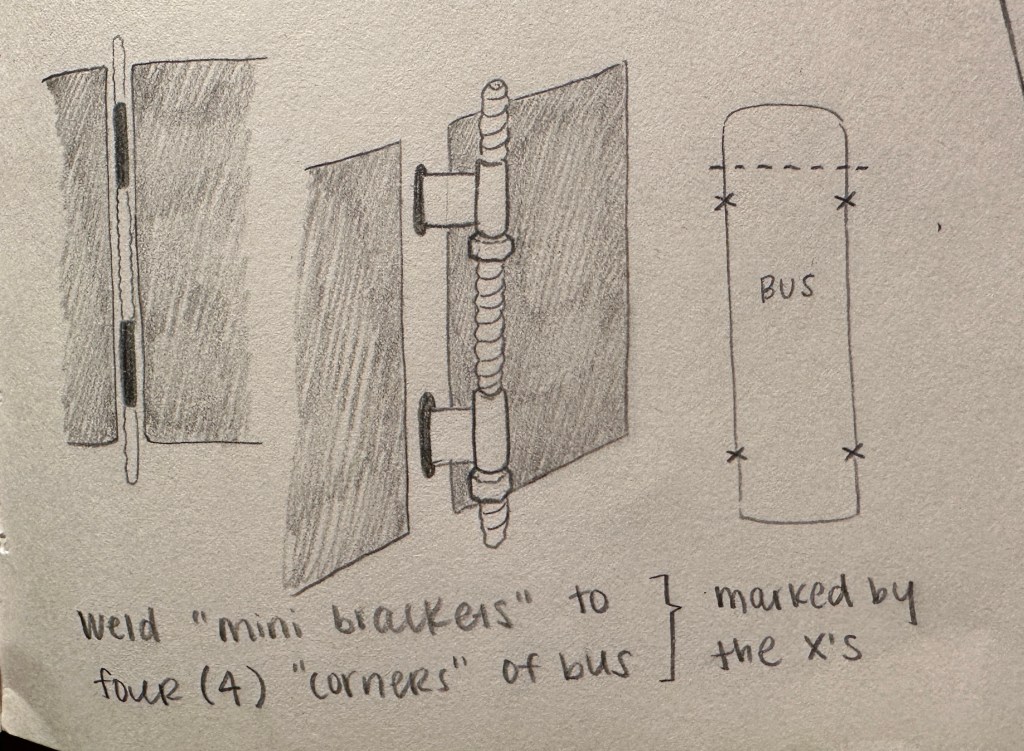
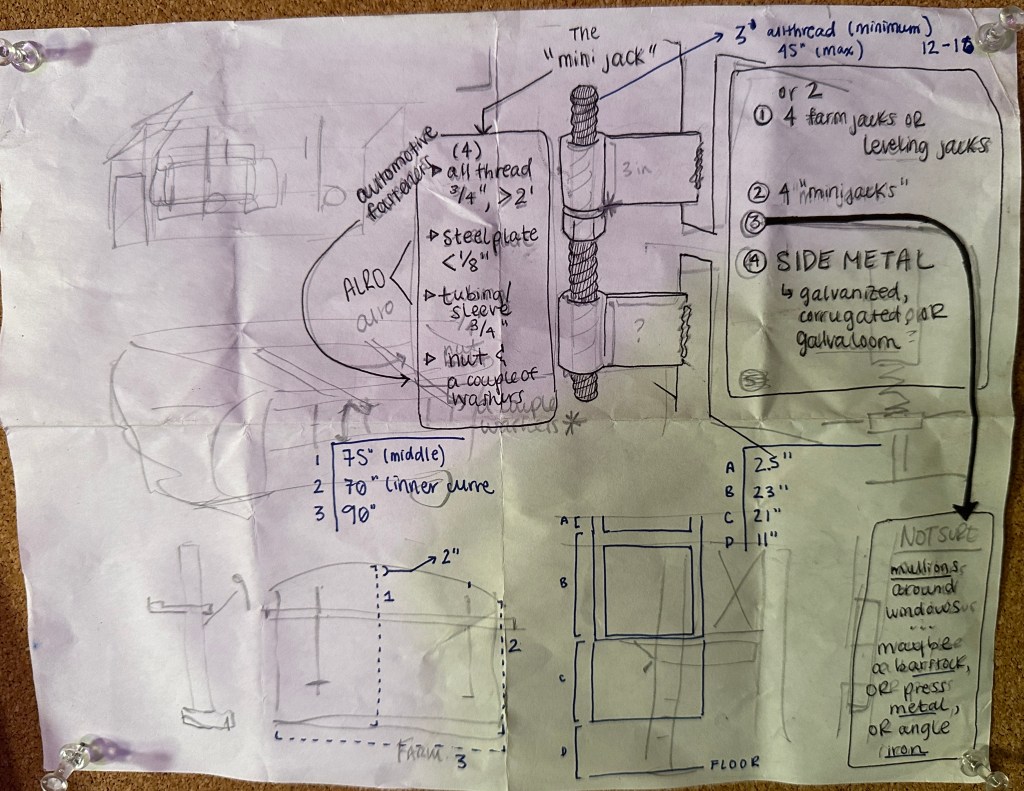
Weeks prior, I had fabricated 4 “Mini Brackets,” as I called them, consisting of all thread, tubing, and metal plates. I purchased: one 4-foot tube (~1″ inside diameter), four 4-foot all-thread rods that fit seamlessly inside the tube (~1″ thickness), and eight metal plates of 3-4 gauge (~1/4-” thickness).
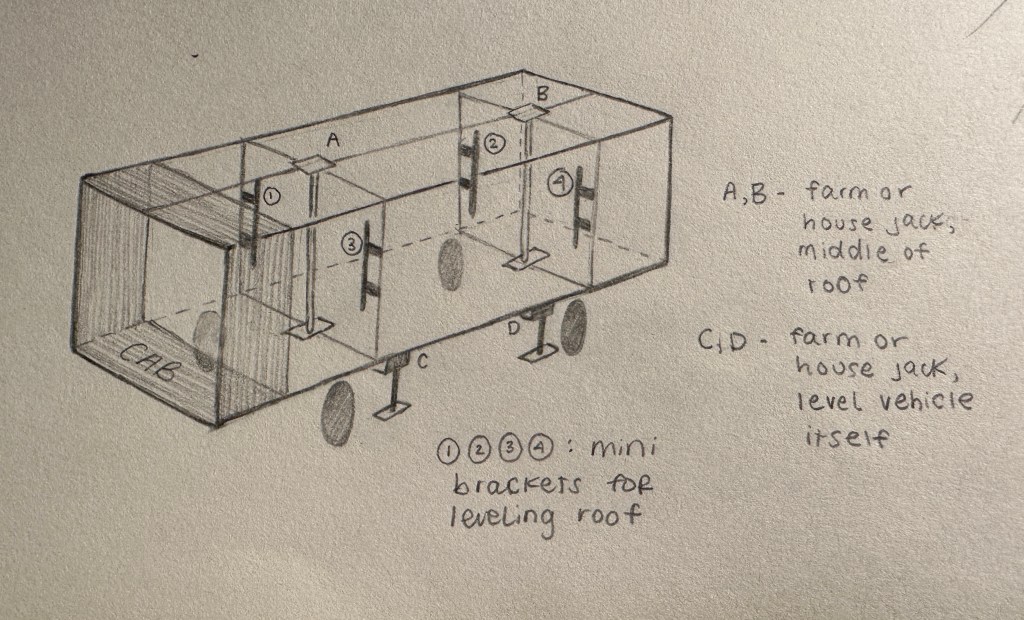
I cut the 4-foot tube into 8 pieces (~6″ in length apiece). I then welded each 6-inch tube to the metal plates. Finally, I threaded these 8 pieces of tube-and-plate onto four 4-feet all threads with nuts on either side of each tube. (See Page 1, Figure 3)
When it came time to do the roof raise, all the team needed to do was weld each 1/4-inch thick plate to the hat channels on all four corners of the bus. These mini brackets would act as the “levelers” of the raise, while house jacks held the bulk of the weight.
Hat channels are hat-shaped metal framing rods, wherein the center of the “hat” is like a channel. The channel side faces the exterior, allowing the mini brackets to be welded to the backs of the hat channels. - The Roof Cut
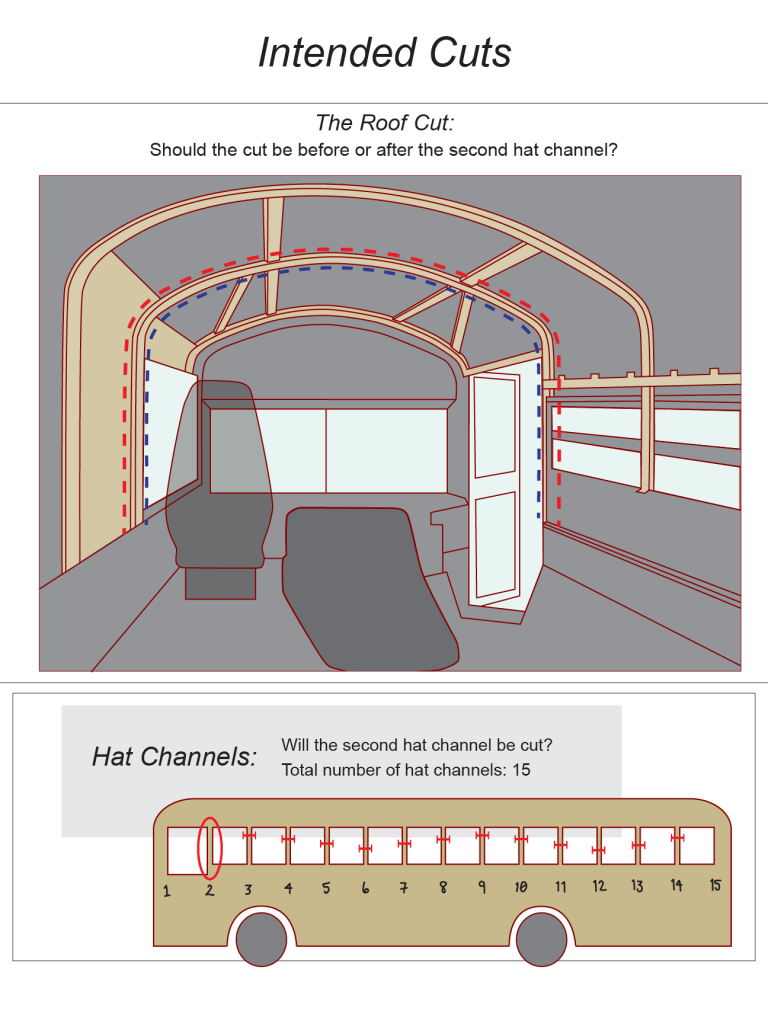
As demonstrated in both the graphic and the final result, we selected neither the red or blue dotted lines! Instead, we cut horizontally all the way around the entire “head” of the bus, just above the windshield. The two main reasons for this were to not lose the headspace above the cab, and minimize the amount of fabrication required to reconnect the roof pieces thereafter. - Hat Channels
Hat channels are hat-shaped metal framing rods, wherein the center of the “hat” is like a channel. The channel side faces the exterior, allowing the mini brackets to be welded to the backs of the hat channels.
Because we opted for the entire roof being cut, all the hat channels were also cut. What remained the same was the staggering of the cuts: this allowed for certain degrees of freedom with each hat channel and facilitated leveling the roof.
We were fortunate enough to have a bridge crane available for the sheet metal part of the process to “lift and tack” each panel along the sides with Sikaflex sealant-adhesive and temporary self-drilling screws (later replaced with rivets). Amazingly, we accomplished the entire roof raise in under six days!
Other Designs
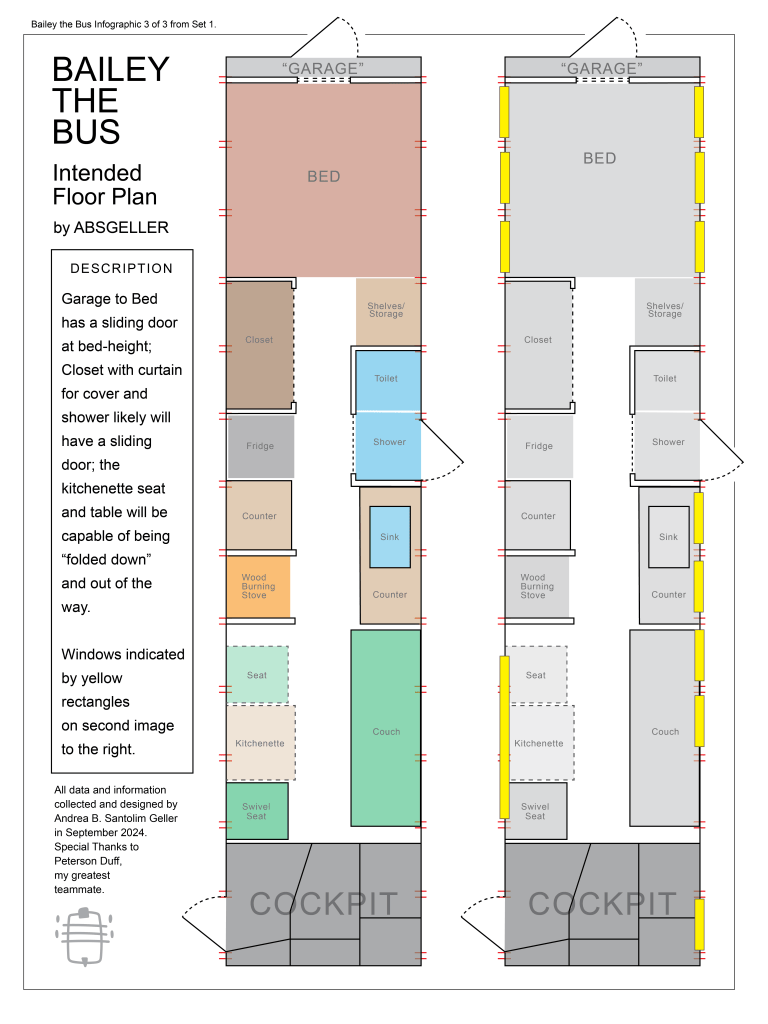
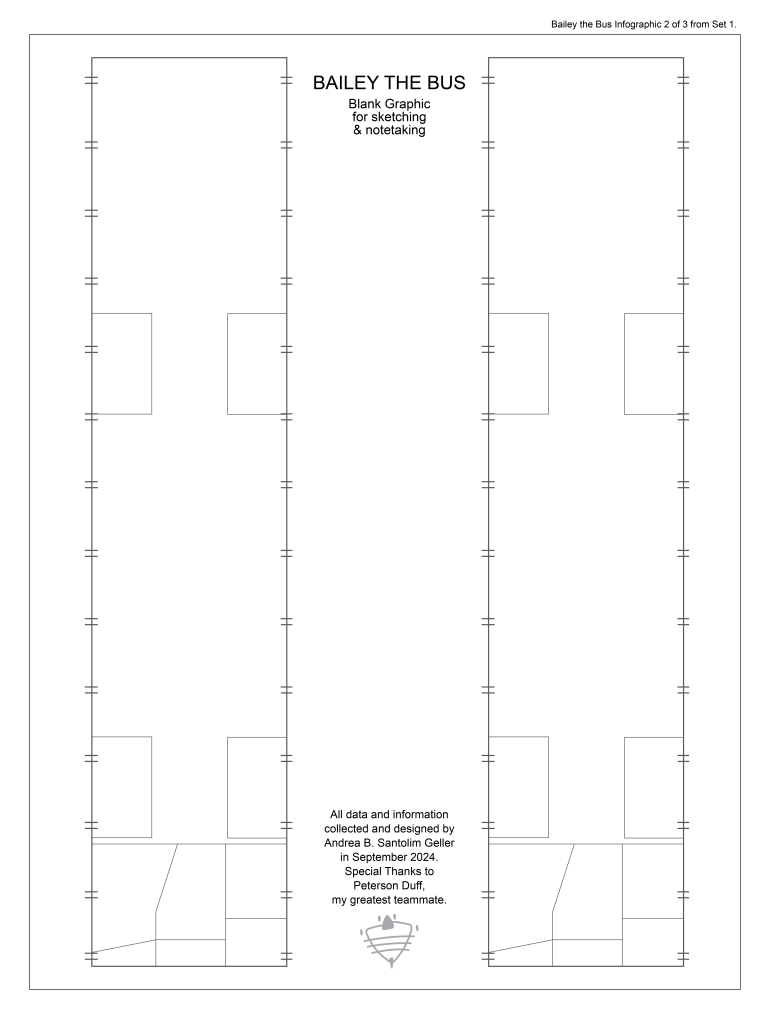
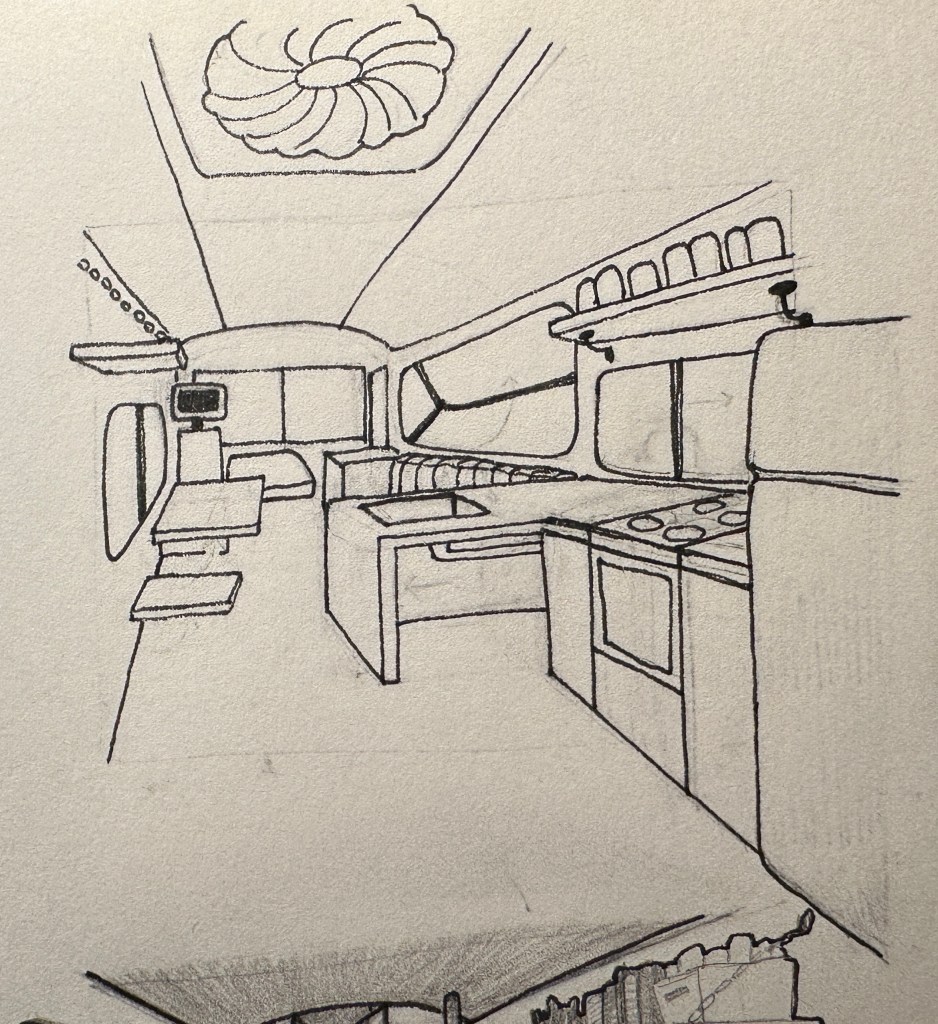
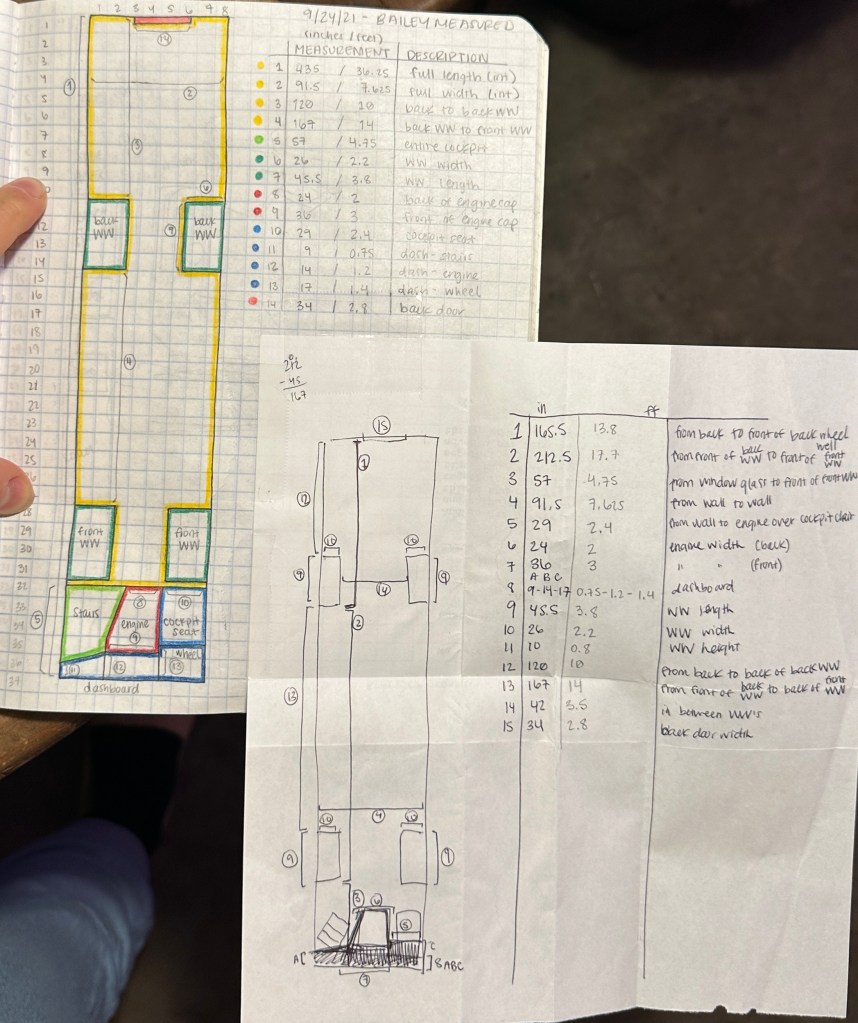
The other designs were illustrated primarily for personal use, to sketch out ideas and take notes on the plan we came up with.
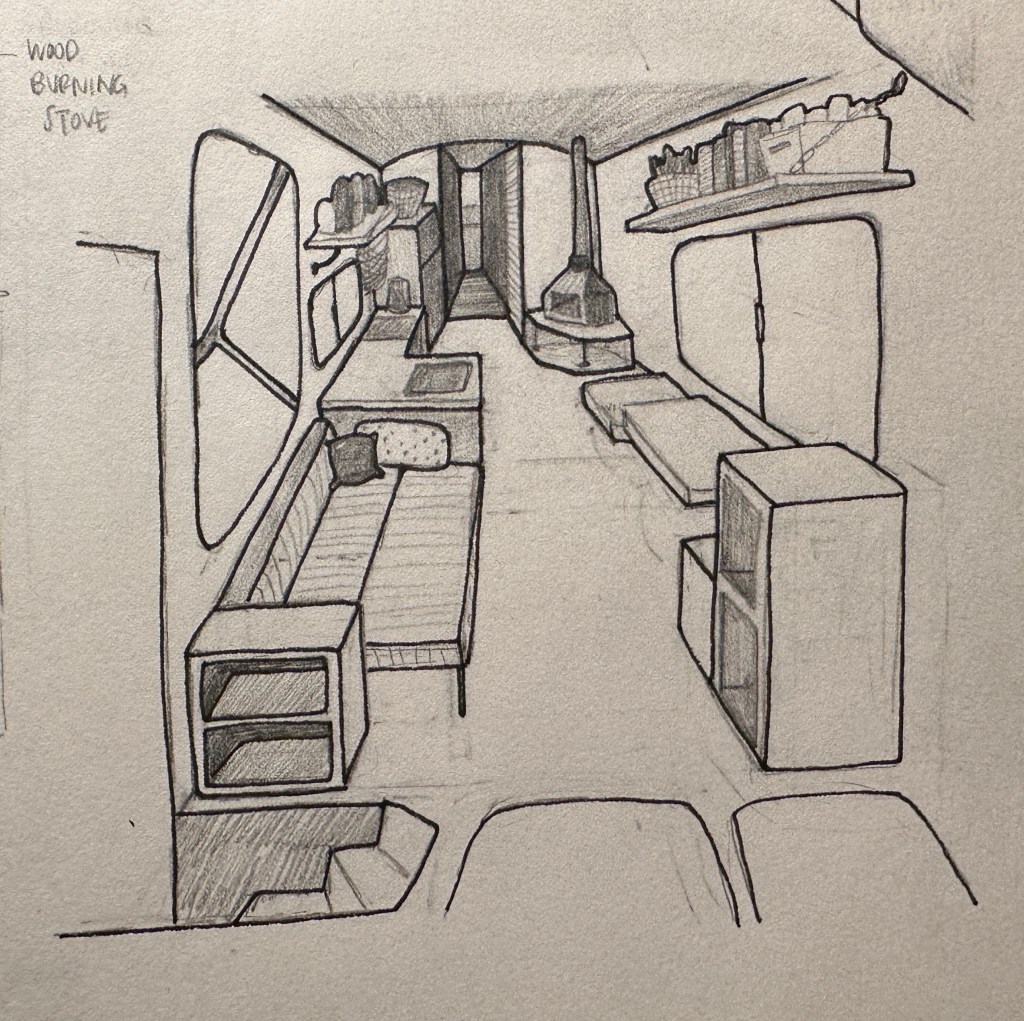
Original Sketches
Just for fun, check these out! For those of you who know Jim… can you find his work? 👀


Leave a comment